How do I assign an examination?
In Examinations, specify the examination name, deadline, and comment. If the doctor needs the result, write right away what the patient should send after completion: file, photo, conclusion, or numeric indicators.
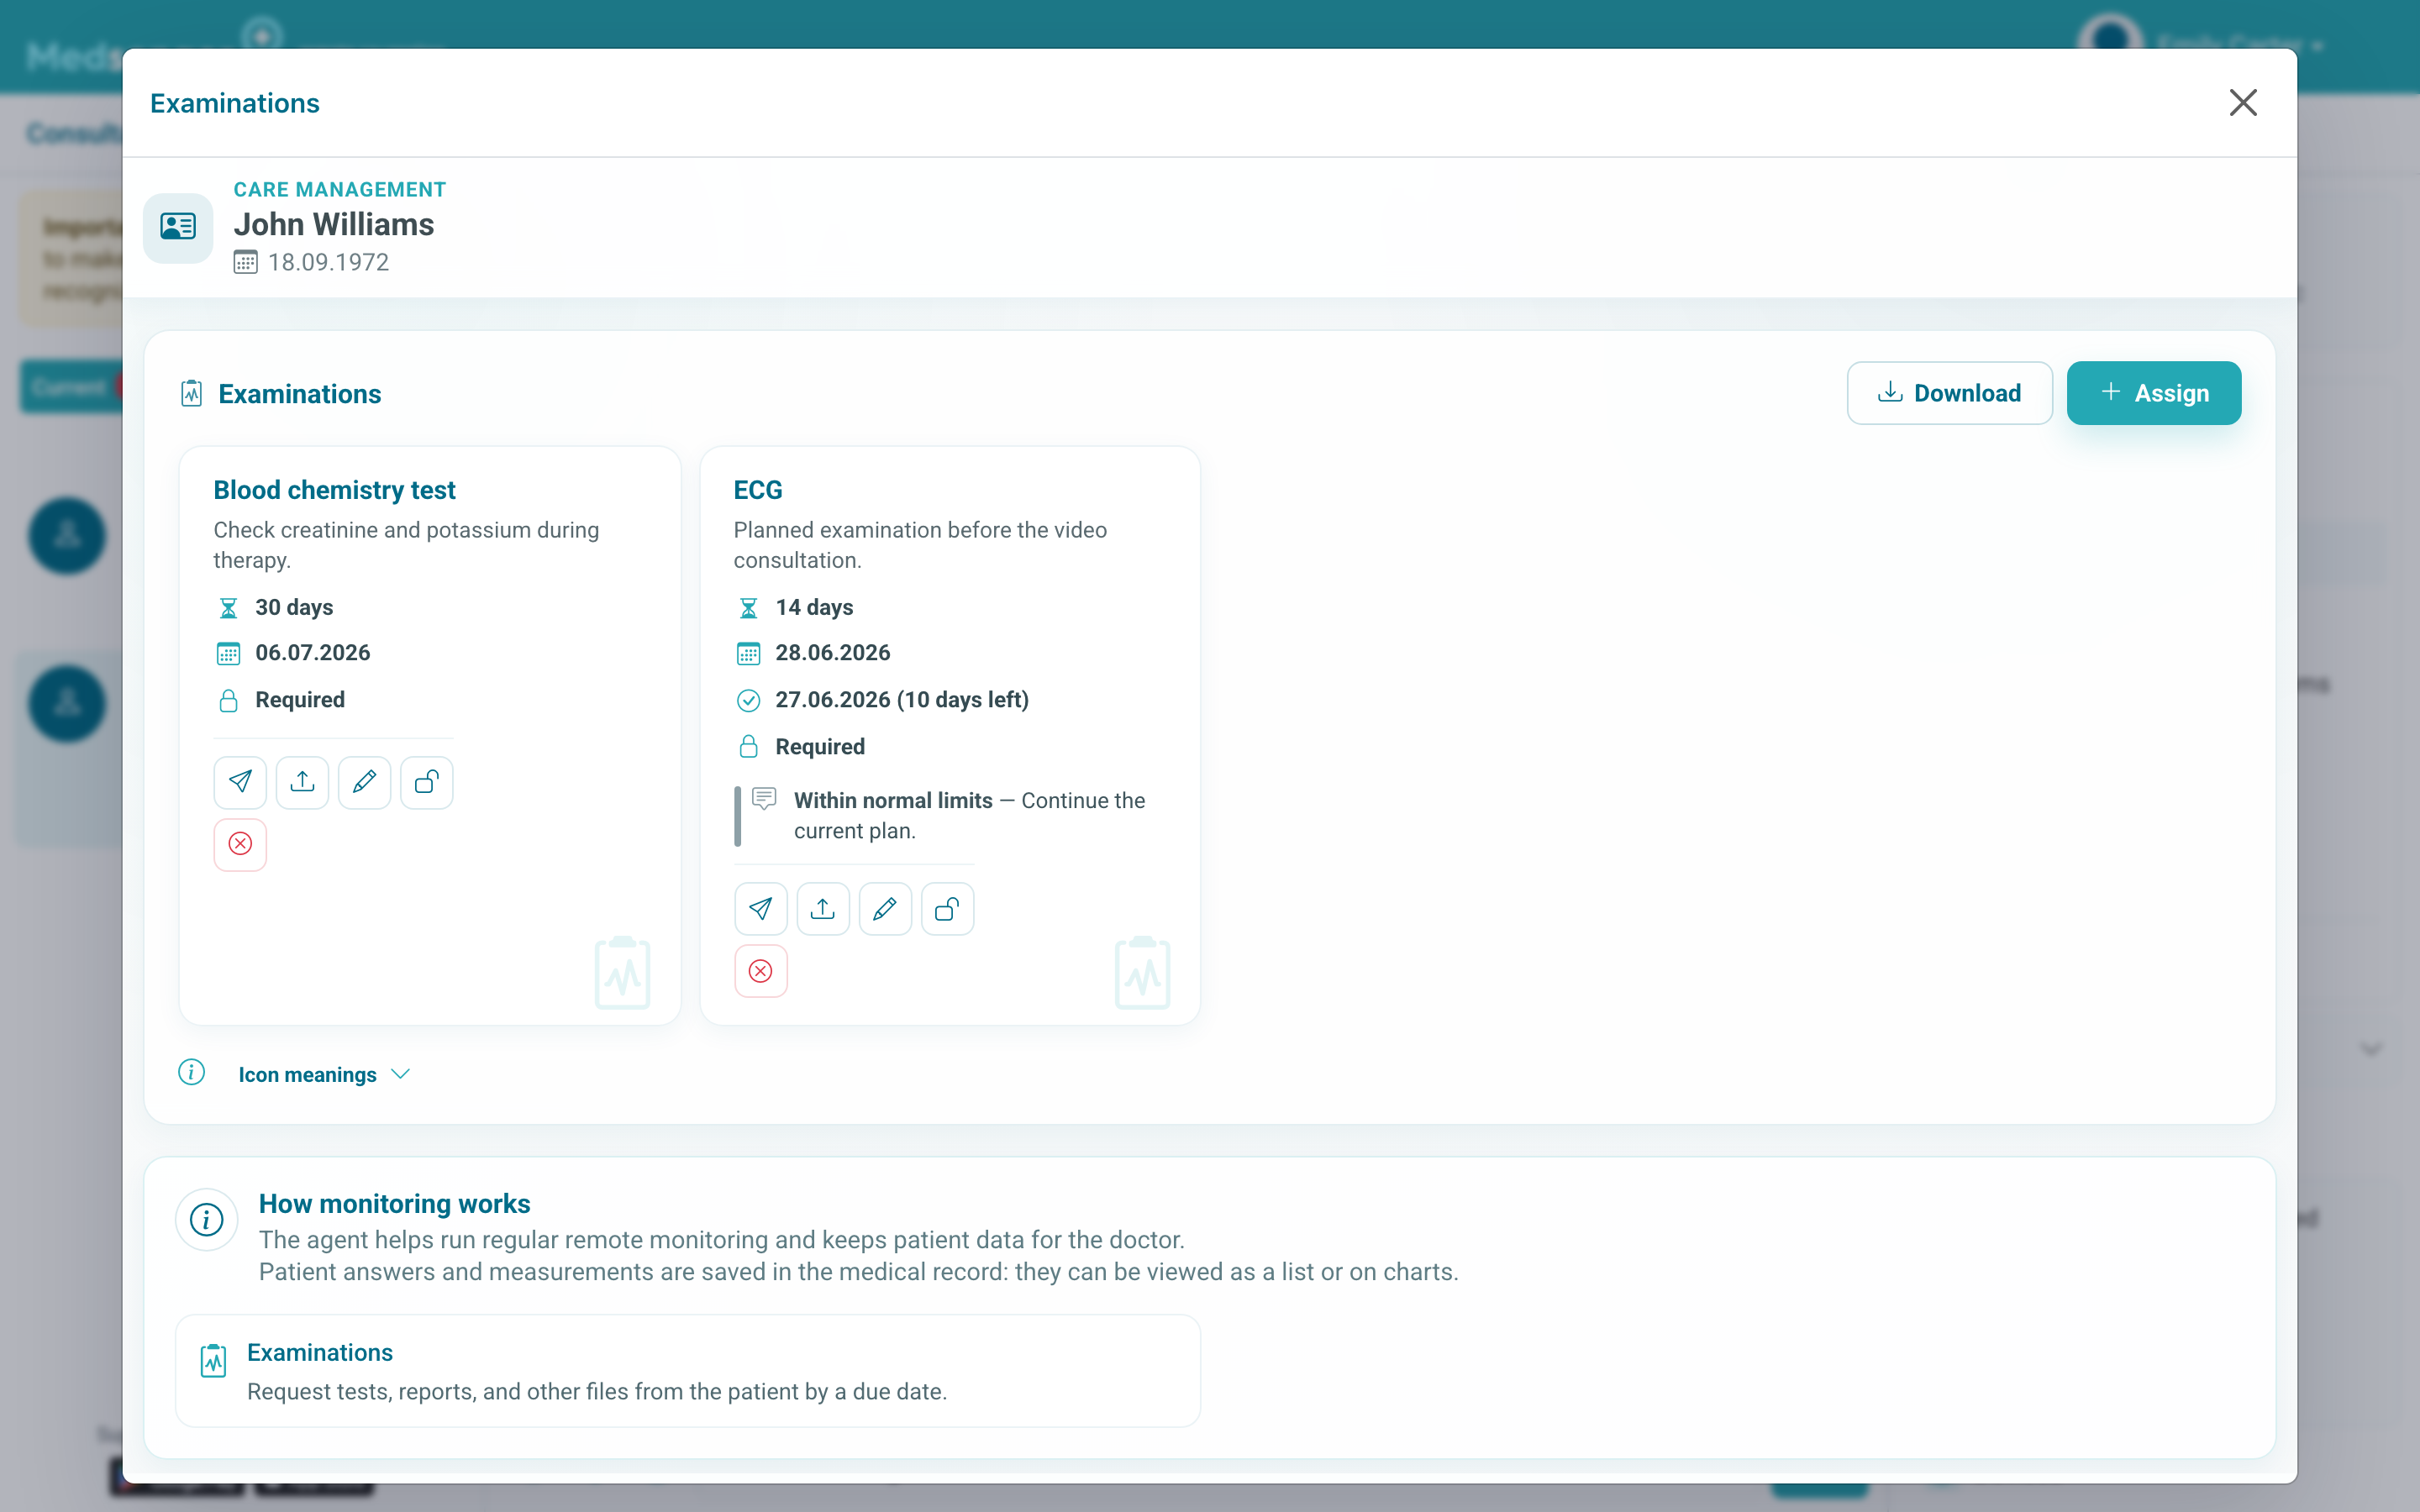
Click Assign examination. If there is no suitable template, click Add and fill in examination parameters.
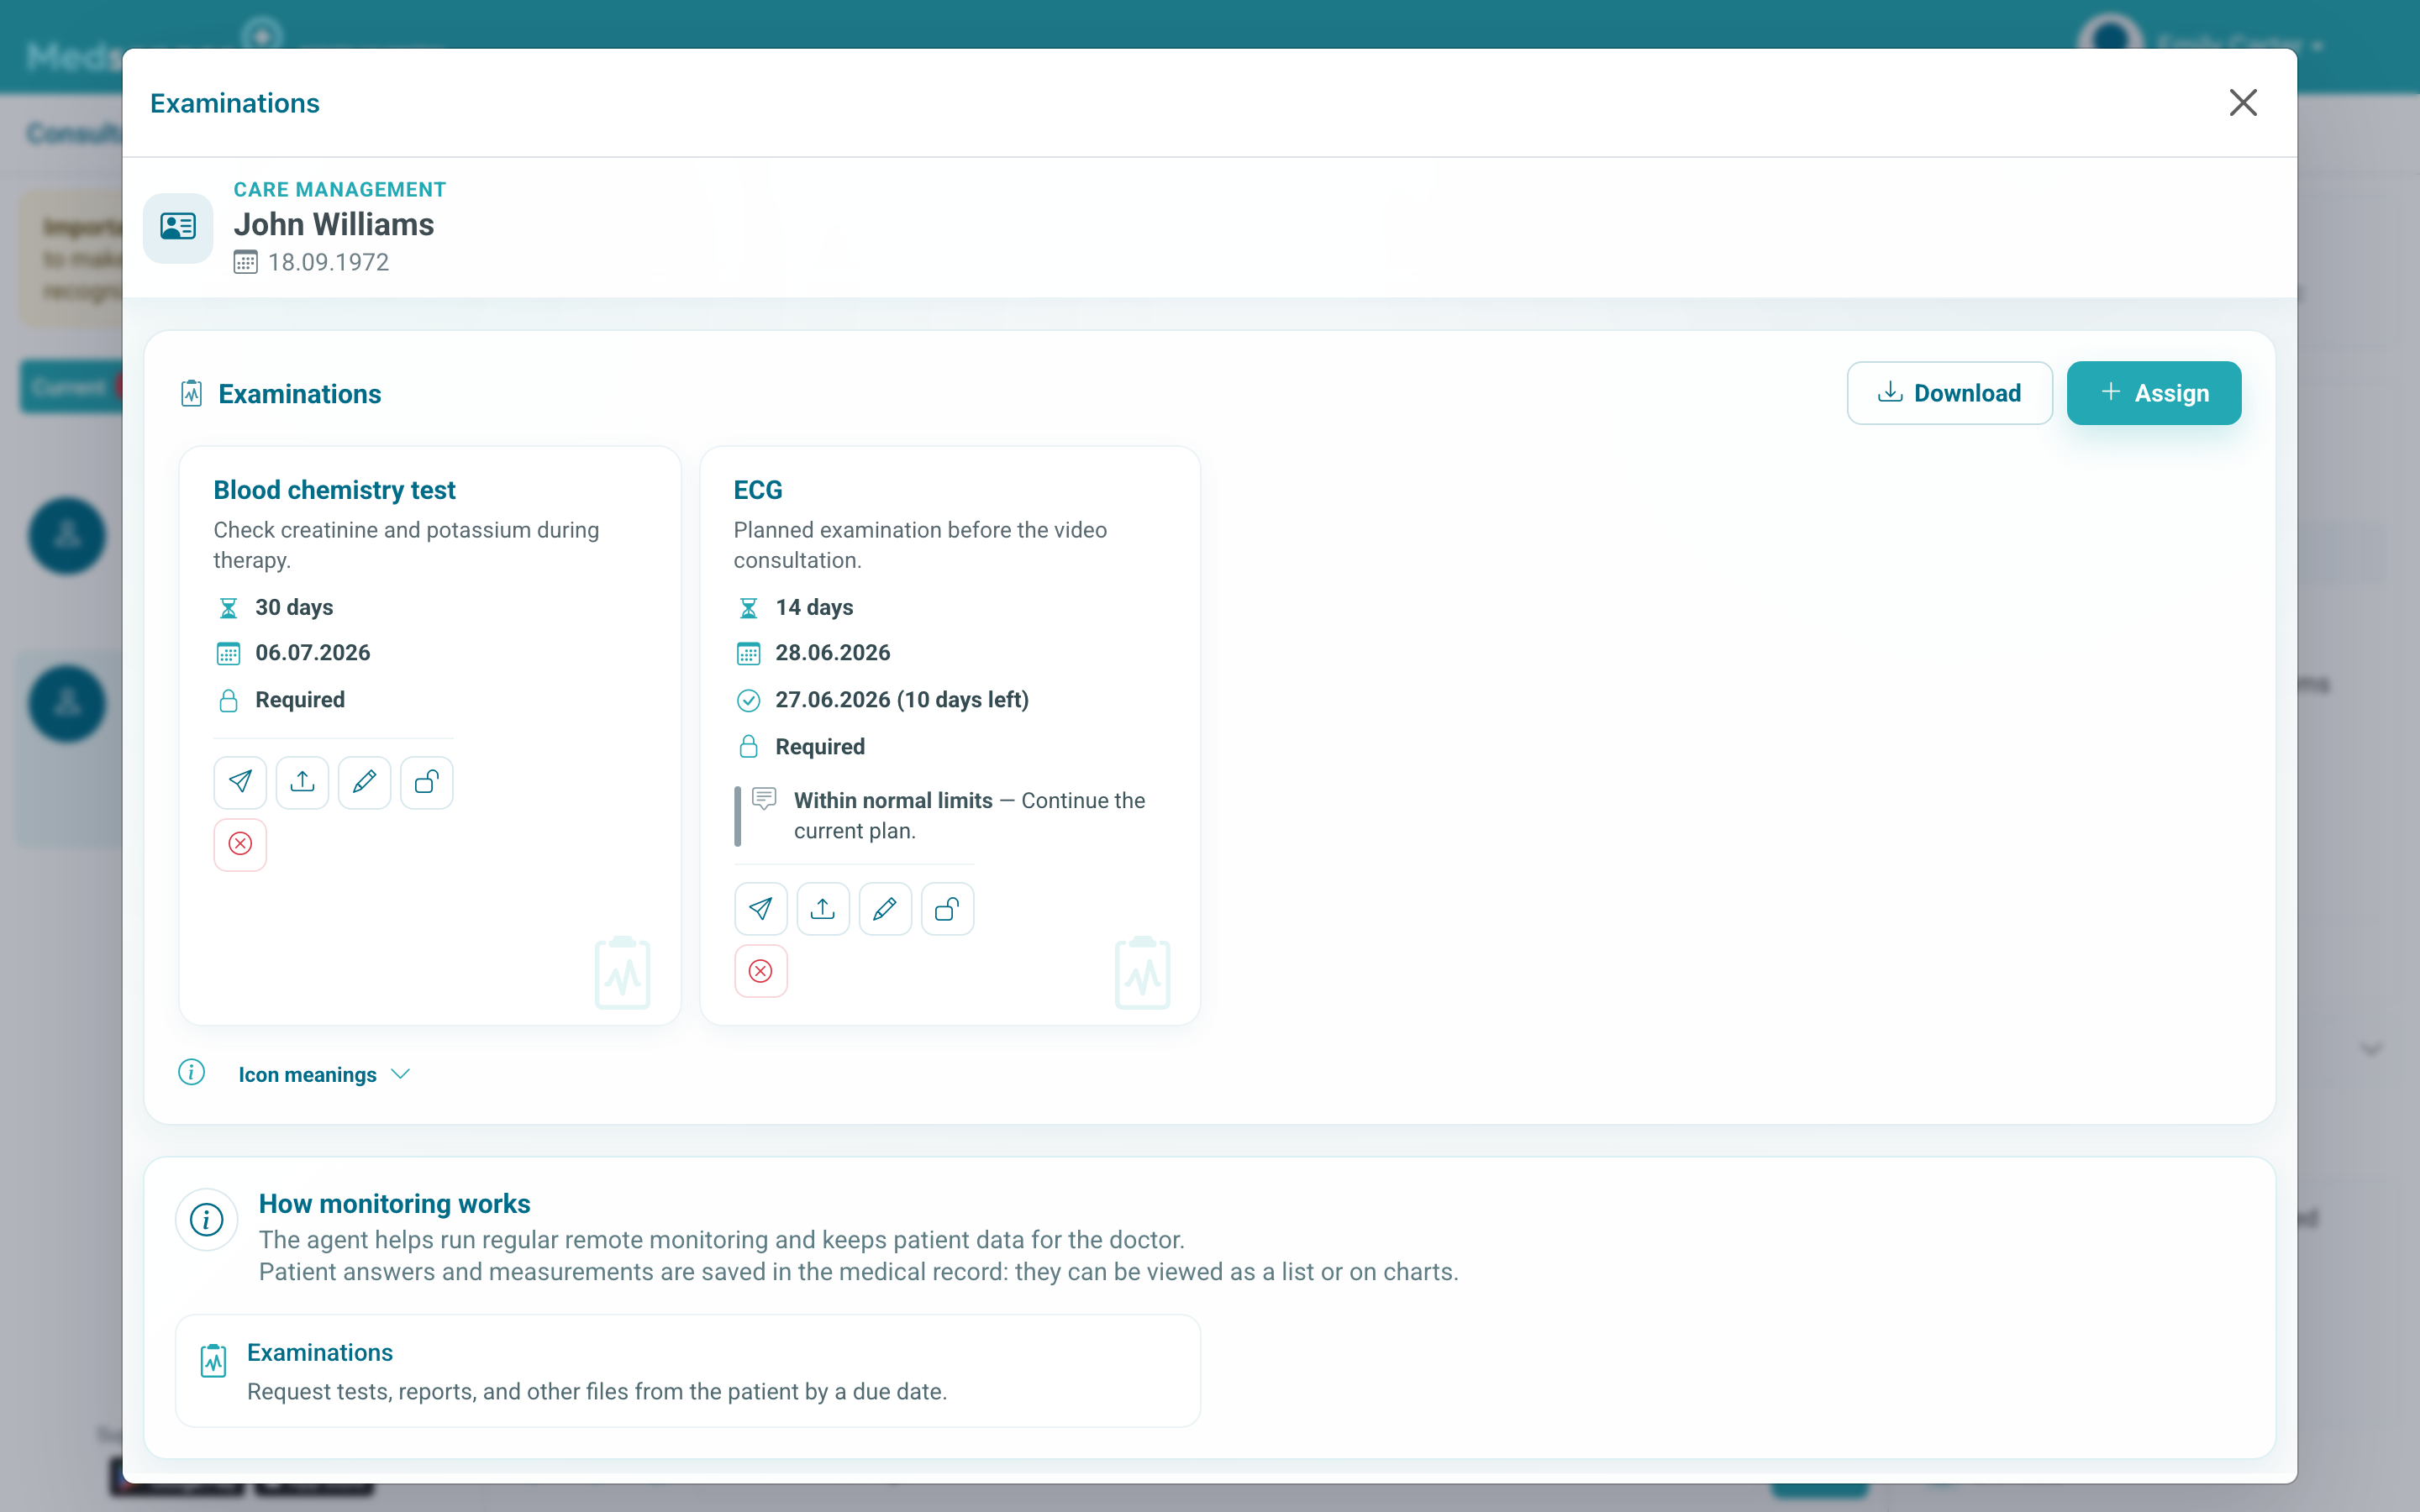
In the form, specify examination name, description for the patient, and description for the doctor. Then choose the deadline for result upload and the period during which the examination is considered valid.
If the result should not expire, enable Valid indefinitely. If the patient may hide the examination from their list, enable the corresponding setting.
The deadline is needed not only for the patient: it helps understand whether the task is overdue and when to expect the result. Use the comment for preparation requirements, result format, and next step.
For medical documents, explain the format in advance: readable pdf, jpg, or png. If the result needs discussion, ask the patient to send it in the chat, not only mark the examination completed.
After the patient uploads the result, check it in the examination list, chat, or consultation documents. If the result should be stored as a medical document, upload it to the document block in the right panel after receiving it.
If the patient should only show the result during an appointment and not upload a file, write this in the description. Otherwise, the patient may mark the examination completed without a file, while the doctor waits for a document in the system.
If the examination is assigned again, specify a new deadline and do not leave the old task active unnecessarily. This way the patient will see the new task, and the doctor can distinguish the new result from the previous one.